Lots of little pieces over the past two weeks:
- After breaking my Android development environment in Nicaragua last December I finally have a working setup again. I can build and run hello world on my Nexus7 and HTC One!
- Started a conversation with Sally Southwick in Alumni/Development about NSF and foundation support for this project. Developed a preliminary budget (see GDrive folder) to be refined as we learn more.
- Started a conversation with Jay Roberts and GLI about developing a wilderness like program in Iceland. There is a lot of enthusiasm for this idea. The next step is for us to discuss this, and if we think it’s practical/interesting to do we would develop a proposal to the GLI for funding the development over the coming year.
- Oli replied to our last message, I will start working on a reply from us.
Things I’d like to do this coming week:
- Develop and distribute a signed APK of hello world that someone else downloads and runs using Android Studio.
- Nudge Sally Southwick, this is not a typical project and obtaining funding, especially from the NSF, will require a certain amount of effort and finesse.
- If the wilderness bit sounds like a good idea develop a proposal for funding the development of it for the GLI.
- Work with folks on the sub-terrain survey ideas.
- Work with folks on the ballon terrain survey ideas.
 he issue of improving internet at Skalanes I did some research into the topography between the Skalanes lodge and the ferry station where the internet antenna is. I used google earth to draw a line from the ferry station to the lodge. It turns out that the are some mountains over 2,000ft in between which could be a large
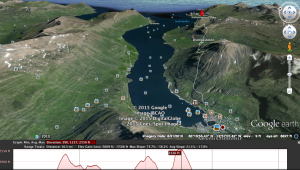
 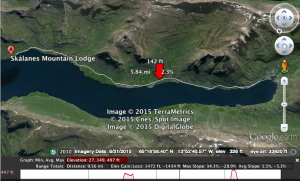 obstacle in the implementation of a balloon. Although the signal ‘curves’ it still seems like it would be hard to make the internet here more reliable this way. The screenshot on the left shows the topographic 3D map from the ferry station, looking down the fiord towards Skalanes.